
How to Install an External Windscreen Sunvisor (Step-by-Step)
Table of Contents
How to Install an External Windscreen Sunvisor (Step-by-Step)
How to Install an External Windscreen Sunvisor (Step-by-Step)
Installing an external windscreen sunvisor can be a straightforward upgrade when you have the correct vehicle-specific visor, brackets and mounting hardware. However, proper alignment and secure mounting are essential. A poorly fitted visor can sit unevenly, create unwanted movement, interfere with accessories or affect the driver’s view.
The exact installation method varies between vehicles. Some external sunvisors use existing mounting points, while others use dedicated brackets that attach around the windscreen frame, roof edge or existing visor mounting locations.
This step-by-step guide explains how to install an external windscreen sunvisor, what tools you may need, how to prepare the vehicle, how to align the visor and what to check before driving.
Important: Always follow the installation instructions supplied with your specific sunvisor. If the installation requires drilling into the vehicle body, unfamiliar electrical work, structural modifications or removal of safety equipment, consider having the installation completed by a qualified professional.
What Is an External Windscreen Sunvisor?
An external windscreen sunvisor is a visor mounted outside the vehicle, generally above the windscreen.
Unlike an interior sunshade that sits behind the glass, an external visor is positioned on the exterior of the vehicle and is designed to provide shade around the upper windscreen area.
External sunvisors are available in different materials and designs, including:
- Solid metal sunvisors
- Mesh sunvisors
- Vehicle-specific sunvisors
- Universal-style visors
- Classic truck-style visors
- 4WD and touring sunvisors
The correct installation method depends heavily on the particular product.
For example, some vehicle-specific mounting systems use existing factory attachment points, while other designs require brackets to be positioned and adjusted before the visor is secured. Manufacturer installation instructions commonly emphasize leaving brackets slightly loose until the visor has been correctly positioned and aligned.
Before You Install Your External Sunvisor
Don’t start by picking up the drill.
The most important part of a successful installation happens before any hardware is tightened.
1. Confirm the visor fits your vehicle
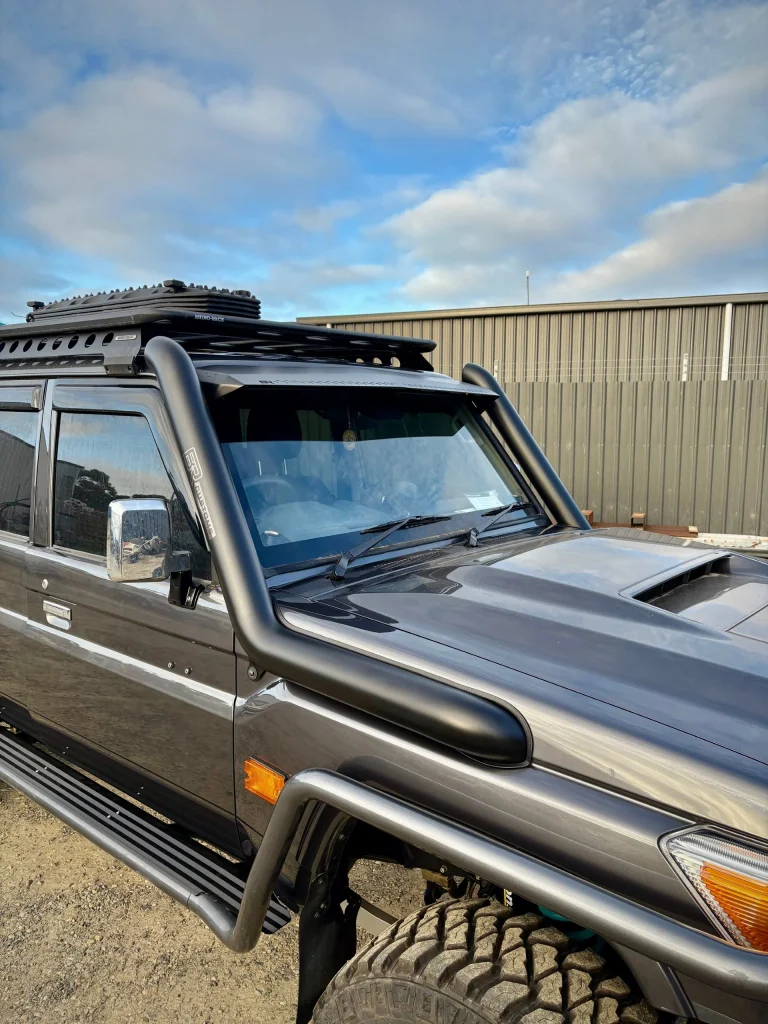
Check:
- Vehicle make
- Model
- Generation
- Model year
- Cab configuration
- Body style
- Existing accessories
- Correct mounting kit
This is especially important with older vehicles.
For example, an external sunvisor designed for a Toyota Hilux N70 may not use the same mounting system as one designed for an N80 or an older LN106.
Our guide on How to Choose the Right Sunvisor for Your Exact Vehicle Model explains why vehicle-specific fitment matters.
2. Read the supplied instructions
If your visor comes with installation instructions, read them completely before beginning.
Do not assume that every external visor installs the same way.
Some systems use existing screws and mounting points. Others use brackets, clamps or additional hardware. Certain products may require drilling, sealing or access behind trim.
3. Inspect the vehicle
Look closely at the upper windscreen and roof area.
Check for:
- Rust
- Previous repairs
- Cracked paint
- Loose trim
- Existing holes
- Previous visor brackets
- Roof racks
- Snorkels
- Antennas
- Spotlights
- Other accessories
Older vehicles deserve particular attention because previous modifications or corrosion can affect the available mounting points.
Tools You May Need
The exact tools depend on the visor and vehicle, but a typical installation may require:
- Socket set
- Ratchet
- Spanners
- Screwdrivers
- Allen keys or hex keys
- Torx bits
- Measuring tape
- Masking tape
- Marker or pencil
- Trim-removal tool
- Drill and appropriate drill bits, if specified
- Rust protection or primer, if drilling is required
- Appropriate sealant, where specified
- Clean cloth
- A second person to assist with positioning
Do not automatically drill holes simply because a universal installation guide shows drilling.
If your visor is designed around existing vehicle mounting points, drilling may be unnecessary.
Step 1: Park the Vehicle on a Level Surface
Start with the vehicle parked on a flat, stable surface.
Engage the parking brake and make sure there is enough space around the front of the vehicle to work safely.
A level surface makes it easier to judge whether the visor is centred and sitting at the correct angle.
This matters more than it may seem.
A visor can appear centred from one side while actually being slightly rotated or offset when viewed from the front.
Step 2: Clean the Mounting Area
Clean the upper windscreen area and the locations where the brackets will be installed.
Remove:
- Dirt
- Dust
- Mud
- Grease
- Old adhesive
- Loose paint
- Surface contamination
A clean surface makes it easier to inspect the mounting area and position the brackets accurately.
If your installation requires sealant or protective material, follow the product manufacturer’s instructions regarding surface preparation.
Step 3: Lay Out the Components
Before mounting anything, place all components on a clean surface.
Separate:
- Sunvisor
- Mounting brackets
- Bolts
- Nuts
- Washers
- Spacers
- Rubber strips
- Gaskets
- Support brackets
- Installation hardware
Compare the components with the supplied instructions.
This is a simple step, but it can prevent confusion later.
Step 4: Test-Fit the Mounting Brackets
The next step is to test-fit the brackets without fully tightening them.
This is one of the most important parts of the installation.
Vehicle-specific visor installation instructions commonly recommend keeping mounting hardware loose initially so the product can be centred and adjusted before final tightening.
Position the brackets according to the supplied instructions.
Do not force a bracket into a position where it doesn’t naturally align.
If something doesn’t line up, stop and check the instructions and fitment rather than modifying the bracket immediately.
Step 5: Position the Sunvisor
With the brackets loosely installed, carefully place the sunvisor into position.
This is where having a second person helps.
One person can hold the visor while the other checks:
- Centre alignment
- Bracket position
- Windscreen clearance
- Roof clearance
- Side-to-side symmetry
- Clearance around accessories
Stand several metres in front of the vehicle and look at the visor straight on.
Then check it from both front corners.
The visor should appear symmetrical and correctly positioned relative to the vehicle.
Step 6: Check Windscreen Clearance
Do not push the visor tightly against the windscreen.
The visor should be positioned according to its supplied installation instructions and should have the appropriate clearance.
Some external visor installation instructions specifically warn against forcing the product tightly against the glass because excessive pressure can damage the windscreen.
Check the entire length of the visor for:
- Glass contact
- Uneven gaps
- Bracket interference
- Trim interference
- Excessive movement
If the product uses a gasket or rubber edge, make sure it is positioned correctly rather than compressed excessively.
Step 7: Centre the Sunvisor
Now carefully centre the visor.
Measure from the relevant vehicle reference points rather than relying only on visual judgment.
Check both sides.
For example, compare:
- Left bracket position
- Right bracket position
- Distance from roof edges
- Distance from the windscreen corners
- Visor overhang on both sides
A second person standing directly in front of the vehicle can make this much easier.
Do not fully tighten anything until you are satisfied with the position.
Step 8: Check Accessory Clearance
This step is particularly important for modified 4WDs, utes and touring vehicles.
Check clearance around:
Snorkel
Make sure the visor and its brackets do not interfere with the snorkel.
Antenna
Check that the visor does not obstruct or contact the antenna.
Roof rack
Confirm that the visor does not interfere with the front section of the roof rack.
Lights and accessories
If you have roof-mounted lights or other accessories, confirm that the visor does not contact them.
Doors and seals
Check that the mounting arrangement does not interfere with the door frame, weather seals or surrounding trim.
Step 9: Tighten the Mounting Hardware Gradually
Once the visor is correctly positioned, begin tightening the mounting hardware gradually.
Do not immediately tighten one bolt completely while leaving the others loose.
Instead, work progressively around the mounting points.
This helps maintain alignment as the brackets settle into position.
Where the manufacturer specifies a torque value, use that specification rather than guessing.
Vehicle-specific installation instructions may provide exact torque values for their mounting hardware, so these should take priority over generic advice.
Step 10: Check the Visor Again
After tightening the brackets, step back and inspect the installation again.
Look from:
- Directly in front
- Driver’s side
- Passenger’s side
- Above, where practical
- Inside the vehicle
Confirm that the visor hasn’t moved while the hardware was tightened.
If it has shifted, loosen the appropriate hardware, reposition it and tighten again.
Do not simply accept an uneven installation because the bolts are already tight.
Step 11: Inspect the Mounting Points
Now inspect every mounting point.
Look for:
- Loose bolts
- Missing washers
- Incorrect hardware
- Bracket movement
- Metal distortion
- Gaps
- Contact with the windscreen
- Contact with bodywork
- Excessive tension
If drilling was required, make sure any exposed metal has been appropriately protected against corrosion according to the installation instructions.
This is particularly important on older vehicles.
A small untreated hole can eventually become a corrosion problem.
Step 12: Check the Driver’s View
Sit in the driver’s seat and look through the windscreen.
The visor should not create an unacceptable obstruction to the driver’s required field of view.
Check the view while sitting normally and from the usual driving position.
The purpose of an external sunvisor is to help manage sunlight and glare—not to create a new visibility problem.
Installation guidance for vehicle sunvisors likewise emphasizes choosing a position that does not affect the driver’s free view.
If the visor sits too low, too far forward or at an inappropriate angle, correct the installation before driving.
Step 13: Perform a Final Movement Check
With the installation complete, gently check the visor for movement.
Do not try to bend or force it.
Instead, apply light hand pressure to determine whether there is obvious looseness.
Check:
- Centre section
- Left side
- Right side
- Brackets
- Fasteners
There should be no obvious loose bracket or uncontrolled movement.
If you detect movement, identify the source before driving.
Step 14: Take a Short Test Drive
Once everything has been checked, take a short test drive in a safe area.
Listen for:
- Rattling
- Vibrations
- Wind noise
- Bracket movement
- Unusual body noise
After the drive, inspect the mounting hardware again.
This is especially useful after the first installation because small alignment or fastening issues can become noticeable only once the vehicle is moving.
Should You Drill Into the Roof?
This depends entirely on the visor design.
Some external sunvisors require drilling, while others are designed around existing mounting points or vehicle-specific brackets.
If drilling is required, it should be treated as a permanent vehicle modification.
Before drilling:
- Confirm the exact hole location.
- Measure twice.
- Check both sides for symmetry.
- Confirm there are no wires, hoses or other components behind the drilling location.
- Use the specified drill size.
- Protect exposed metal against corrosion.
- Use the specified sealant or gasket where required.
Never drill based solely on a photograph or a generic installation example.
Some visor installation instructions explicitly specify hole locations and sealing procedures, demonstrating how installation can vary considerably between products.
Can You Install an External Sunvisor Yourself?
In many cases, yes.
A confident DIY enthusiast with the correct vehicle-specific visor, basic hand tools and a suitable installation guide can often complete the job.
However, DIY installation becomes less appropriate when:
- Significant drilling is required
- The mounting structure is unclear
- The vehicle has serious rust
- The roof has previously been repaired
- Wiring is located near the mounting area
- The visor requires structural modification
- You are unsure about the correct mounting hardware
- The installation affects vehicle safety equipment
- The visor does not appear to fit correctly
If you encounter any of these issues, professional installation can be the safer option.
For more information, read our related guide: Can You Install a Windscreen Sunvisor Yourself, or Do You Need a Mechanic?
Common External Sunvisor Installation Mistakes
Installing the wrong visor
The most expensive mistake can be purchasing a visor that was never designed for your vehicle.
Always verify fitment first.
Tightening everything too early
If you fully tighten the brackets before positioning the visor, you may make alignment much harder.
Keep the hardware loose until the correct position has been established.
Ignoring the windscreen
The visor should not be forced against the glass.
Allow the clearance specified by the manufacturer.
Failing to check both sides
A visor that looks correct from the driver’s side may still be noticeably crooked when viewed from the front.
Check both sides.
Forgetting accessories
Snorkels, roof racks, antennas and other accessories can interfere with installation.
Check them before tightening the visor.
Drilling without checking behind the panel
Never assume the area behind a mounting point is empty.
Confirm what is behind the panel before drilling.
Over-tightening
More tightening does not necessarily mean a better installation.
Use the manufacturer’s torque specifications where available.
Skipping the post-installation inspection
Always check the visor after installation and again after the first short drive.
Solid vs Mesh External Sunvisor Installation
The installation process for a solid sunvisor and a mesh sunvisor can be broadly similar when they use the same vehicle-specific mounting system.
The important difference is not necessarily the installation method but the design and mounting hardware supplied with the particular visor.
A solid visor may have a different weight or bracket arrangement from a mesh model.
Therefore, don’t assume that the mounting hardware from one style can be transferred to another.
If you’re still deciding which type to buy, read:
Solid vs Mesh Windscreen Sunvisors: Which Is Right for Your Vehicle?
External Sunvisor Maintenance After Installation
Installation isn’t the end of the process.
An external sunvisor is exposed to:
- Sunlight
- Rain
- Dust
- Mud
- Road grime
- Wind
- Temperature changes
Periodically inspect the mounting hardware and brackets.
Look for:
- Loose fasteners
- Corrosion
- Cracked brackets
- Damaged rubber
- Paint damage
- Excessive vibration
- New movement
Cleaning the visor regularly can also help you spot developing problems before they become serious.
Our guide How Long Do External Windscreen Sunvisors Actually Last? covers the factors that influence long-term durability.
External Windscreen Sunvisor Installation Checklist
Before calling the installation complete, check every item below:
- Correct visor for the vehicle
- Correct mounting kit
- All brackets installed
- All required hardware installed
- Visor centred
- Left and right sides aligned
- Correct windscreen clearance
- No contact with glass
- No interference with snorkel
- No interference with antenna
- No interference with roof rack
- No interference with bodywork
- All fasteners tightened correctly
- Manufacturer torque specifications followed
- Any drilled areas protected against corrosion
- Driver’s view checked
- Visor checked for movement
- Short test drive completed
- Mounting hardware rechecked
Frequently Asked Questions
How long does it take to install an external windscreen sunvisor?
Installation time varies considerably depending on the vehicle and mounting system. A straightforward vehicle-specific installation may be relatively quick, while a visor requiring drilling, additional brackets or modifications can take considerably longer.
Do I need a professional to install a windscreen sunvisor?
Not necessarily. Many straightforward installations can be completed by a competent DIY installer. However, professional installation is recommended if drilling, structural modification, rust repair or complicated wiring is involved.
Does an external sunvisor touch the windscreen?
It should not be forced tightly against the glass. The correct clearance depends on the visor design, and manufacturer instructions should be followed. Some products use a gasket or rubber edge, but this does not mean the visor should be installed under excessive pressure.
Can I install a sunvisor without drilling?
Some products can be installed using existing mounting points or vehicle-specific brackets, while others require drilling. Check the installation instructions for your particular visor before purchasing.
Should I use threadlocker on the bolts?
Only use threadlocker if recommended by the visor manufacturer or applicable vehicle installation instructions. Do not substitute chemicals or locking methods without checking compatibility with the supplied hardware.
Why is my external sunvisor vibrating?
Vibration can be caused by loose hardware, incorrect bracket positioning, insufficient support, incorrect fitment or a damaged mounting component. Stop and inspect the installation rather than simply tightening random bolts.
Can an external sunvisor be installed on an older vehicle?
Yes, provided the visor and mounting system are appropriate for the vehicle. Older vehicles should receive additional inspection for rust, previous repairs and modifications before installation.
Final Thoughts
Learning how to install an external windscreen sunvisor is relatively straightforward when the correct visor and mounting hardware are used.
The key is not simply getting the visor attached to the vehicle. A good installation should be correctly fitted, centred, securely mounted, clear of the windscreen and accessories, and positioned without creating an unacceptable obstruction to the driver’s view.
Take your time during the test-fit stage. Keep brackets loose until alignment is correct, follow the manufacturer’s hardware and torque specifications, and inspect the installation again after your first short drive.
If you’re still choosing a visor, start by confirming your exact vehicle model and fitment. Then decide whether a solid or mesh design best suits your vehicle.
Explore the [Visor Investments external windscreen sunvisor range]Visor Investments external windscreen sunvisor range and choose a visor designed for your vehicle application.
Leave a Reply