
Can You Install a Windscreen Sunvisor Yourself, or Do You Need a Mechanic?
Table of Contents
Buying an external windscreen sunvisor is one thing. Installing it correctly is another.
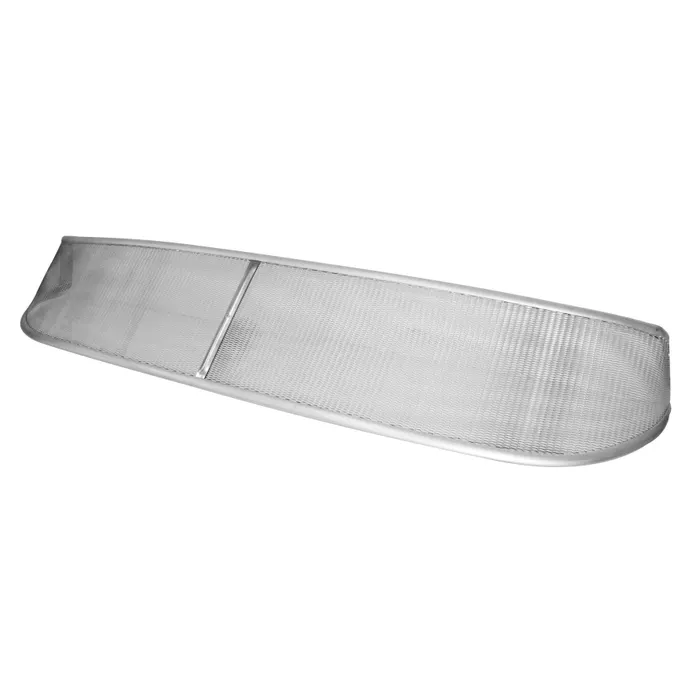
Many vehicle owners wonder whether they can install a windscreen sunvisor themselves or whether the job requires a mechanic or professional installer.
The good news is that some sunvisor installations can be completed by a competent DIYer. However, the difficulty depends heavily on the vehicle, the sunvisor design, the mounting system and whether any drilling or modification is required.
A vehicle-specific sunvisor with straightforward mounting hardware may be relatively simple to install. A more complicated installation involving brackets, drilling, tight clearances or existing vehicle modifications may be better left to an experienced installer.
The most important thing is not simply getting the visor onto the vehicle.
It needs to be securely mounted, correctly positioned and compatible with the vehicle.
In this guide, we explain what is involved in installing an external windscreen sunvisor, what tools you may need, when DIY installation makes sense and when it is smarter to call a professional.
What Is Involved in Installing an External Sunvisor?
An external windscreen sunvisor sits above the vehicle’s windscreen and is normally attached using brackets and mounting hardware.
The exact installation method varies between products.
Depending on the vehicle and sunvisor, installation may involve:
- Positioning the visor
- Aligning mounting brackets
- Marking mounting locations
- Installing brackets
- Drilling mounting holes
- Fitting bolts or screws
- Tightening fasteners
- Checking alignment
- Checking clearance
- Inspecting the final installation
Some vehicle-specific products are designed around existing mounting points or dedicated brackets, while others may require additional preparation.
That is why you should always read the product’s installation instructions before deciding whether it is a suitable DIY project.
Can You Install a Windscreen Sunvisor Yourself?
Yes, potentially.
If you have reasonable mechanical skills, the correct tools and a suitable installation area, you may be able to install an external windscreen sunvisor yourself.
However, there is an important distinction between being able to physically install the accessory and installing it correctly.
A sunvisor that looks straight but is poorly secured is not a successful installation.
Before starting, consider:
- Does the product come with the required hardware?
- Are the mounting locations clearly identified?
- Will drilling be necessary?
- Do you have the correct tools?
- Can you safely position and support the visor?
- Do you understand the installation instructions?
- Are there existing accessories that could interfere?
- Can you verify the final alignment and security?
If you are uncertain about any of these points, professional installation may be the better option.
When DIY Installation Makes Sense
DIY installation can make sense when the installation is relatively straightforward and you are comfortable working on your vehicle.
You may be a good candidate for DIY fitting if you:
- Regularly perform basic vehicle maintenance
- Are comfortable using hand tools
- Can accurately measure and align components
- Have access to a suitable workspace
- Can follow written instructions carefully
- Understand how to tighten and secure fasteners correctly
- Have experience drilling into vehicle bodywork if drilling is required
The job does not necessarily require a qualified mechanic simply because it is an exterior vehicle accessory.
However, you should be honest about your experience.
If you have never worked on vehicle bodywork before, a sunvisor installation may not be the best project for learning through trial and error.
When You Should Use a Mechanic or Professional Installer
Professional installation is worth considering if the job involves significant modification or if you are not confident working around the vehicle’s exterior.
Consider using a mechanic or experienced installer if:
- Drilling into the vehicle is required
- The installation instructions are unclear
- The visor requires custom brackets
- The vehicle has existing modifications
- The vehicle has a snorkel or roof rack that affects clearance
- You are unsure where to mount the brackets
- You cannot safely support the visor during installation
- You do not have the correct tools
- The visor does not appear to align correctly
- You are concerned about vehicle visibility or compliance
Professional installation can also be worthwhile for expensive or rare vehicles where you want to minimise the risk of damaging paintwork or body panels.
What Tools Might You Need?
The tools required depend on the particular sunvisor and vehicle.
A basic installation may require some combination of:
- Socket set
- Spanners
- Screwdrivers
- Allen keys
- Measuring tape
- Marker or marking tool
- Drill
- Appropriate drill bits
- Level
- Protective tape
- Cleaning materials
Do not automatically assume that every tool on this list is required.
Your product’s installation instructions should determine the actual tools needed.
If drilling is required, use the correct drill bit for the material and take appropriate care around wiring, trim and other components behind the mounting area.
Step 1: Confirm the Sunvisor Fits Your Vehicle
Before you even take out your tools, verify the product.
Check:
- Vehicle manufacturer
- Model
- Year
- Generation
- Body style
- Cab configuration
- Mounting arrangement
This is critical.
A visor that is designed for a different model may look similar but still have different mounting locations.
Our guide to choosing the right sunvisor for your exact vehicle model explains why make, model, year and generation all matter.
For example, the Ford Courier Windscreen Sunvisor is intended for the Ford Courier application rather than being a generic visor for every Ford vehicle.
Step 2: Read the Installation Instructions
This sounds obvious, but it is one of the most important steps.
Read the instructions before removing anything or drilling any holes.
Look for information about:
- Bracket positioning
- Mounting points
- Hardware
- Drilling requirements
- Torque requirements
- Clearance
- Recommended tools
- Installation sequence
If something is unclear, stop and get clarification rather than improvising.
Step 3: Inspect the Vehicle
Before mounting the visor, inspect the area above the windscreen.
Look for:
- Existing holes
- Trim
- Seals
- Wiring
- Roof accessories
- Antennas
- Snorkels
- Roof racks
- Light bars
- Other aftermarket equipment
This is especially important on touring 4WDs.
A vehicle with a standard roof may have plenty of clearance, while a heavily modified touring rig may have several potential conflicts.
Step 4: Test the Position Before Permanently Installing It
If the installation instructions allow it, position the sunvisor before permanently securing the mounting hardware.
This gives you an opportunity to check:
- Left-to-right alignment
- Windscreen coverage
- Roofline position
- Bracket location
- A-pillar clearance
- Accessory clearance
- Overall appearance
This is a stage where having a second person can be extremely helpful.
One person can hold the visor while the other checks alignment and mounting positions.
Trying to hold a large visor in place while simultaneously measuring and fastening hardware can make the job unnecessarily difficult.
Step 5: Protect the Paintwork
If you are working near painted body panels, take care to prevent scratches.
Clean the mounting area before installation and use appropriate protective measures where necessary.
Avoid placing tools directly onto painted surfaces.
If you are marking drilling locations, make sure your measurements are accurate before making any permanent holes.
Remember:
Measure twice. Drill once.
Step 6: Install the Brackets Correctly
The brackets are what connect the sunvisor to the vehicle, so they deserve particular attention.
Make sure:
- Brackets are correctly oriented
- Mounting points are aligned
- Fasteners are appropriate
- Hardware is properly tightened
- The visor is evenly supported
Do not substitute random hardware simply because it appears to fit.
Use the hardware specified by the manufacturer whenever possible.
Step 7: Check Alignment Before Final Tightening
Before fully tightening everything, step back and look at the visor from several angles.
Check that it is:
- Level
- Centred
- Evenly positioned
- Properly aligned with the windscreen
- Clear of surrounding accessories
A visor can look straight from one angle and noticeably crooked from another.
Taking a few minutes to check the alignment can make a major difference to the finished result.
Step 8: Check Visibility
This is one of the most important checks.
Sit in the normal driving position and assess the visor.
Make sure it does not create an unacceptable obstruction to your view.
The driver’s view should always take priority over appearance.
If the visor appears too low or incorrectly positioned, do not simply accept it.
Recheck the installation instructions and mounting position.
Vehicle visibility requirements vary between jurisdictions, so check the applicable local regulations before installation.
For example, U.S. federal vehicle standards address light transmission and visibility through required glazing areas, illustrating why windscreen-related modifications should be considered carefully. (nhtsa.gov)
Step 9: Check Clearance Around Accessories
If your vehicle has aftermarket equipment, inspect the completed installation carefully.
Check clearance around:
- Snorkel
- Roof rack
- Light bar
- UHF aerial
- Antenna
- Awning
- Cab-mounted accessories
Nothing should be rubbing against the visor or its brackets.
Pay particular attention to moving parts and areas exposed to vibration.
Step 10: Perform a Final Security Check
Before driving, inspect every mounting point.
Check:
- All bolts are secure
- All brackets are correctly positioned
- There are no loose components
- The visor is stable
- There is no unexpected movement
- Nothing is contacting the windscreen or roof
After your first drive, inspect the mounting points again.
This is particularly worthwhile if the vehicle has travelled on rough or corrugated roads.
How Long Does Sunvisor Installation Take?
Installation time varies considerably.
A straightforward vehicle-specific installation may be relatively quick for an experienced DIYer.
A more complicated installation involving drilling, brackets or vehicle modifications can take significantly longer.
Rather than focusing on a specific number of minutes, allow enough time to:
- Read the instructions
- Prepare the vehicle
- Measure carefully
- Test-fit the visor
- Install the hardware
- Check alignment
- Check visibility
- Inspect the final installation
Rushing the job increases the chance of incorrect alignment or poorly secured hardware.
Is Drilling Required?
Sometimes.
Whether drilling is required depends entirely on the vehicle and sunvisor design.
Some products may use existing mounting points or purpose-designed brackets.
Others may require holes to be drilled into appropriate mounting areas.
If drilling is required, take the job seriously.
Before drilling:
- Confirm the exact location
- Check both sides of the mounting surface
- Look for wiring or other components
- Confirm that the hole position matches the instructions
- Protect surrounding paintwork
- Use the correct drill size
If you are not comfortable drilling into your vehicle, professional installation is the sensible choice.
What About 4WD Touring Vehicles?
Installation can require extra planning on a touring 4WD.
A typical touring vehicle may already have:
- Snorkel
- Roof rack
- Awning
- Light bar
- Aerials
- Canopy
- Roof-mounted equipment
The sunvisor must work with the existing setup.
This is one reason our article on the best external sunvisors for 4WD touring rigs recommends checking accessory clearance before buying.
Do not wait until installation day to discover that a snorkel or roof rack interferes with the visor.
Mesh vs Solid: Does Installation Differ?
The basic installation principles are generally similar, but the exact hardware and construction can vary.
A mesh windscreen sunvisor may have a different weight, frame and mounting arrangement from a solid visor.
A solid sunvisor may have a larger continuous panel and therefore different mounting requirements.
The important point is not to assume that the installation method for one visor applies to another.
Follow the instructions for the specific product.
If you are still deciding between the two styles, see our guide: Solid vs Mesh Windscreen Sunvisors: Which Is Right for Your Vehicle?.
Common DIY Installation Mistakes
Installing the wrong visor
Always confirm the exact vehicle application first.
Measuring only once
Small measurement errors can create noticeable alignment problems.
Drilling without checking behind the mounting area
Never assume the space behind a panel is empty.
Installing without checking accessory clearance
Snorkels, roof racks and other equipment can interfere with installation.
Overlooking visibility
The finished visor should not create an unacceptable obstruction.
Rushing the final tightening
Take time to check alignment before permanently securing the hardware.
Not checking the visor after driving
Vibration can reveal installation problems that were not obvious when the vehicle was stationary.
DIY or Mechanic? A Simple Decision Guide
| Situation | DIY? |
|---|---|
| Clear vehicle-specific instructions | Usually reasonable |
| Basic hand tools required | Usually reasonable |
| Existing mounting points | Easier |
| No vehicle modifications | Easier |
| Drilling required | Depends on experience |
| Custom brackets required | Consider professional |
| Modified 4WD | Professional may be preferable |
| Unsure about mounting location | Professional recommended |
| Unsure about visibility | Get professional advice |
| Expensive or rare vehicle | Professional installation worth considering |
Can a Mechanic Install an External Sunvisor?
Yes.
A mechanic, bodywork professional or experienced vehicle accessory installer may be able to install an external sunvisor depending on the product and vehicle.
For more specialised installations, an experienced bodywork or accessory installer may be particularly useful where drilling, bracket fabrication or vehicle modifications are involved.
If you are asking a professional to install the visor, provide them with the product’s installation instructions and confirm that the product is designed for your exact vehicle.
What Should You Do After Installation?
Do not consider the job finished the moment the last bolt is tightened.
Take the vehicle for a short drive and pay attention to:
- Unusual vibration
- Movement
- Noise
- Contact with the vehicle
- Changes in visibility
After the drive, inspect the mounting hardware.
For vehicles used on rough roads or long touring trips, periodic inspection is a sensible maintenance habit.
If you notice movement, looseness or damage, stop using the accessory until the problem has been identified and corrected.
Frequently Asked Questions
Can I install a windscreen sunvisor myself?
Yes, some vehicle-specific external sunvisors can be installed by competent DIYers. The difficulty depends on the vehicle, product design, mounting system and whether drilling or modifications are required.
Do I need a mechanic to install a sunvisor?
Not always. A mechanic or professional installer is recommended when the installation involves drilling, custom brackets, difficult access, vehicle modifications or when you are not confident doing the work yourself.
Do external sunvisors require drilling?
Some do and some do not. The installation method depends on the specific vehicle and product. Always check the manufacturer’s instructions before purchasing or starting installation.
How long does it take to install a windscreen sunvisor?
Installation time varies by vehicle and product. A straightforward vehicle-specific installation can be relatively quick, while drilling, custom brackets and modified vehicles can require considerably more time.
Can I install a sunvisor on a 4WD with a snorkel?
Possibly. Compatibility depends on the exact vehicle, sunvisor and snorkel arrangement. Always check clearance before purchasing and installing the visor.
Should a sunvisor be level?
It should be correctly aligned according to the manufacturer’s installation instructions. Check the visor from multiple angles before final tightening to ensure it is positioned correctly.
Can a windscreen sunvisor obstruct visibility?
If incorrectly designed, positioned or installed, an external accessory could affect visibility. Always check the final position from the normal driving position and comply with applicable local vehicle regulations.
Should I check the sunvisor after installation?
Yes. Inspect the mounting hardware before the first drive and again after the initial drive. Periodic checks are particularly useful for vehicles that regularly travel on rough or corrugated roads.
Final Verdict: DIY or Professional Installation?
So, can you install a windscreen sunvisor yourself?
In many cases, yes — provided the product is suitable for your vehicle, the installation instructions are clear and you have the necessary skills and tools.
A straightforward vehicle-specific installation can be a manageable DIY project.
But there is no prize for doing the job yourself if you are uncomfortable with drilling, measuring, brackets or vehicle bodywork.
If the installation is complicated, your vehicle has significant modifications, or you are unsure about the mounting or visibility, using a mechanic or experienced accessory installer is the better choice.
The most important thing is a secure, correctly aligned and vehicle-compatible installation.
Before buying, make sure you have selected the right product for your exact make, model, year and configuration.
You can browse the Visor Investments sunvisor range to find vehicle-specific options.
If you own a Ford Courier, take a look at the Ford Courier Windscreen Sunvisor or the Ford Courier 1999–2006 Mesh Windscreen Sunvisor.
And before ordering, use our guide to choosing the right sunvisor for your exact vehicle model to confirm your fitment details.
Choose the right visor, install it correctly and check it carefully before you hit the road.
Leave a Reply